Courtney Warren is a Texas-based interior designer whose work has been featured in Real Simple, Better Homes & Gardens, Good Housekeeping, Apartment Therapy, and Today.com. She is a frequent consultant on Fox 4 TV’s Good Day program in Dallas, was ranked in the top 3 percent of interior designers in the US by Houzz.com, and starred in the Dallas episode of TLC’sFour Houses. She delights in helping overwhelmed clients create beautiful spaces—and will never turn down a warm chocolate chip cookie or Diet Dr Pepper.
Shop the projects
My Go-To design accessories
Pretty in Pink: Unleashing the Magic of Pink Christmas Decorations

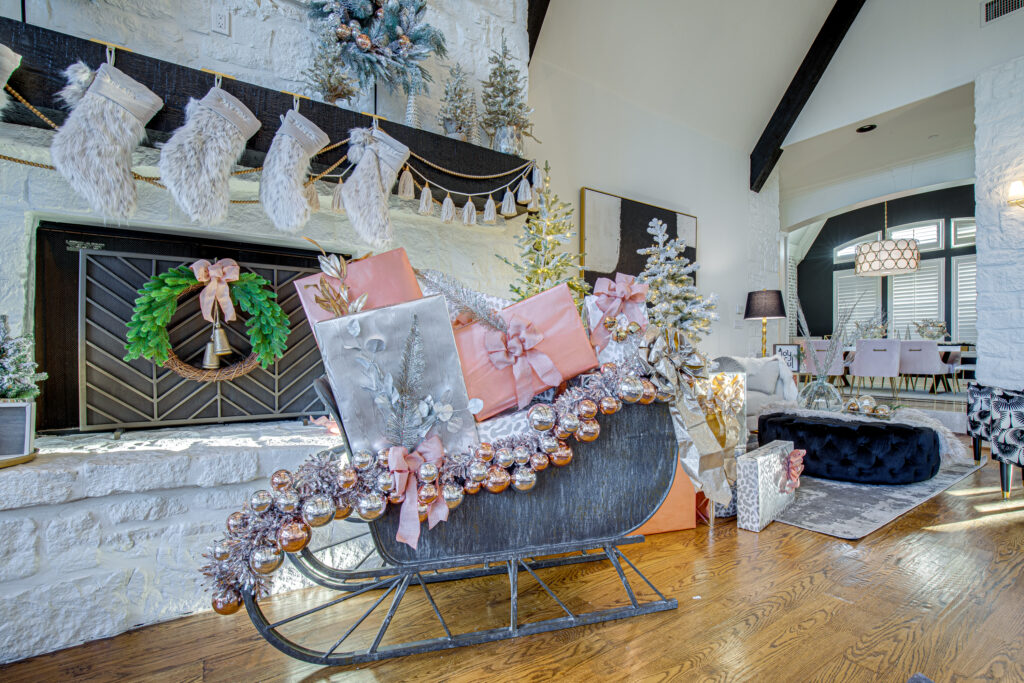
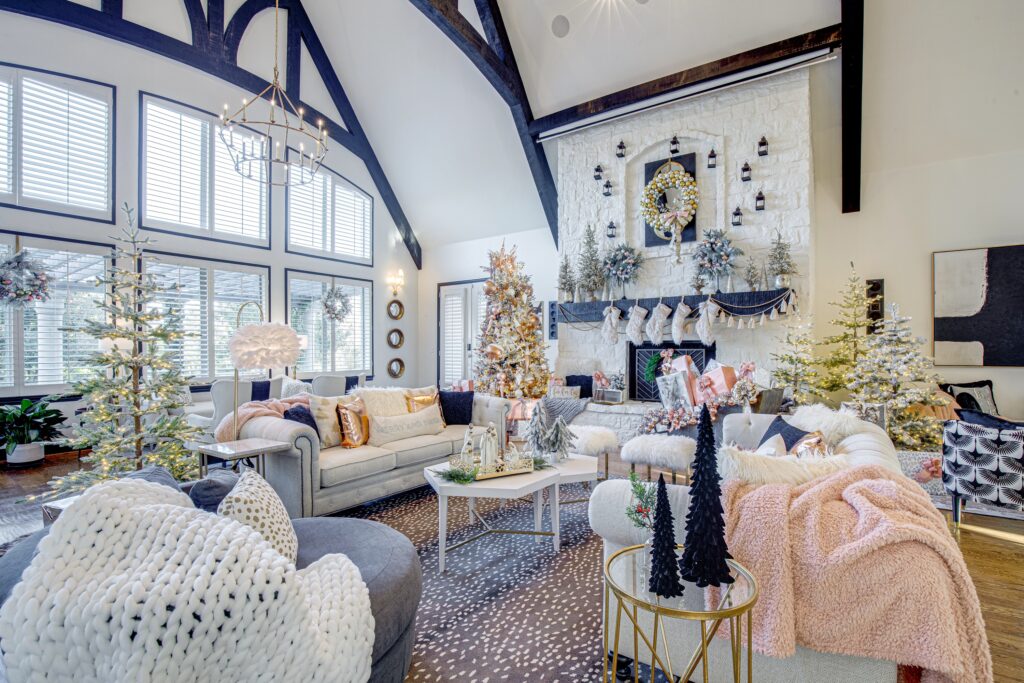
Hey there, festive decorators! Ready to shake things up this holiday season? Well, put away the traditional red and green, because this year, we’re diving headfirst into the magical world of pink! Pink Christmas decorations are not just for the princesses; they bring a touch of whimsy, elegance, and, of course, undeniable charm to your home. So, grab your tinsel and let’s sprinkle some rosy magic around!
Are you wanting some unique Christmas tree decorations for a more modern Christmas tree in 2023? Allow me to give you some colorful Christmas tree decor ideas that will go beyond the classic red and green.
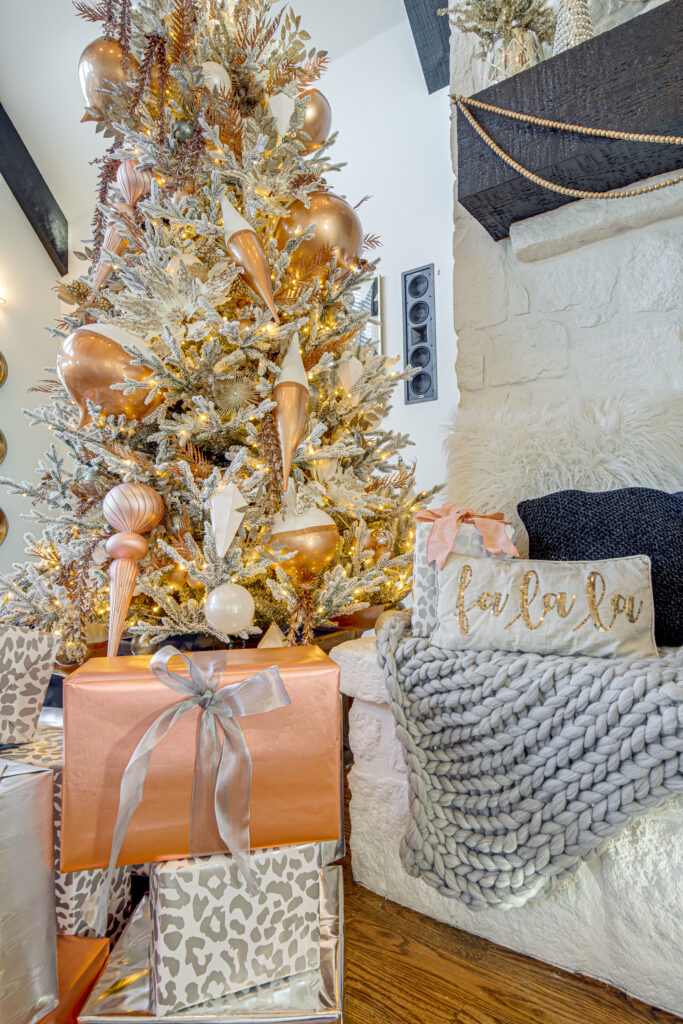
First, let’s start with decorating your Christmas tree with blush pink and champagne. You might be wondering, is pink a Christmas color? We say, heck yeah! In 2023, Christmas colors can stretch as far as your imagination, so let’s embrace this pink aesthetic and create something truly special.
Here are three reasons why blush pink and champagne make a gorgeous decorated Christmas tree:

1. Think Pink, Think Theme
Before you start, decide on your pink Christmas theme. Are you going for a playful candy pink or a sophisticated blush tone? Maybe you want to mix them up for that perfect rosy ombre effect. Knowing your shades will make shopping for decorations a breeze.
2. Modern and Trendy
If you’re looking to break away from the traditional red and green color scheme, blush pink and champagne offer a modern and trendy alternative.
These colors make a bold statement and give your tree a contemporary twist.
Once you have your pink canvas, adorn it with pink and silver baubles, twinkling fairy lights, and fluffy cotton candy-like ornaments. Your tree will look like it came straight out of a winter fairy tale.

3. Garland the Pink Way Garlands are your secret weapon. Drape pink garlands over your mantel, staircase, or windows. Add some silver or gold accents for that extra glam. And don’t forget the pink stockings hanging by the chimney with care – Santa will definitely approve!
4. Table Talk: Pink Edition Bring the magic to your dining table. Pink table runners, rose gold cutlery, and blush pink plates can transform your table setting into a winter wonderland. Add a centerpiece of pink and white flowers to complete the look. It’s a feast for the eyes!
Incorporating pink into your Christmas decor is not just a choice; it’s a statement. It’s about embracing the unconventional and infusing your holiday season with a pop of color and a whole lot of personality. So, let your creativity run wild, add some sparkle, and let your home shine in shades of rosy delight. Get ready for a Christmas that’s as sweet as cotton candy and as charming as a winter sunset. Happy decorating, and may your holidays be merry, bright, and oh-so-pink! 🎀🎄✨
Craft the Perfect DIY Christmas Wreath: A Step-by-Step Guide to Festive Home Decor
Get ready to deck the halls with the perfect DIY Christmas wreath! Transform your home into a festive wonderland with our step-by-step guide to creating a stunning holiday decoration. Whether you’re a seasoned crafter or a complete beginner, this article will walk you through the process of making your own personalized wreath that will impress your guests and spread holiday cheer.
With easy-to-follow instructions and clear visuals, our guide will take you from start to finish, ensuring your wreath turns out beautifully every time. From selecting the perfect base, to choosing the right combination of greenery, ornaments, and ribbons, we have the tips and tricks you need to craft a wreath that reflects your unique style.
Not only will making your own wreath save you money, but it’s also a great way to add a personal touch to your holiday decor. So grab your supplies and let’s get crafting! Follow along with our guide and create a Christmas wreath that will be the envy of your neighbors.
Benefits of making your own Christmas wreath
Creating your own Christmas wreath comes with a multitude of benefits. Firstly, it allows you to save money by avoiding the high prices of store-bought wreaths. Additionally, making your own wreath gives you the freedom to customize it to perfectly match your style and home decor. You can choose the colors, materials, and embellishments that resonate with your personal taste and create a wreath that is truly one-of-a-kind.
Crafting your own wreath also provides a sense of accomplishment and fulfillment. It allows you to tap into your creativity and create something beautiful with your own hands. It’s a fun and rewarding activity that can be enjoyed by individuals of all ages and skill levels. Plus, it’s a great way to spend quality time with loved ones during the holiday season.
So, why settle for a generic store-bought wreath when you can unleash your creativity and make a unique masterpiece that will bring joy to your home and everyone who sees it? Let’s dive into the materials you’ll need to get started.
Materials needed for a DIY Christmas wreath
Before you begin crafting your Christmas wreath, it’s important to gather all the necessary materials. Here’s a list of items you’ll need:
1. Wreath base: Choose a wreath base that suits your style and preference. Options include foam wreath forms, wire wreath frames, or even natural materials like grapevine or willow branches.
2. Greenery: Select a variety of greenery to give your wreath a lush and festive look. Popular choices include pine branches, cedar, eucalyptus, and holly.
3. Floral wire: Floral wire is essential for securing the greenery and decorations to the wreath base. Opt for a sturdy gauge wire that can hold everything in place.
4. Decorations and embellishments: This is where you can get creative and showcase your personal style. Consider adding ornaments, pinecones, berries, bows, or even small figurines to your wreath.
5. Ribbon: A beautiful ribbon adds a finishing touch to your wreath. Choose a ribbon that complements the colors and theme of your overall design.
6. Hot glue gun: A hot glue gun will come in handy for attaching delicate decorations or securing loose elements.
Now that you have all your materials ready, let’s dive into the step-by-step guide to creating your DIY Christmas wreath.
Step-by-step guide to creating a DIY Christmas wreath
1. Start by preparing your wreath base. If you’re using a foam wreath form, you can leave it as is. For wire frames or natural branches, shape them into a circular form using pliers or your hands.
2. Begin attaching the greenery to your wreath base. Start with the larger branches and secure them using floral wire. Overlap the branches to create a full and balanced look.
3. Once the base layer of greenery is in place, add smaller sprigs and leaves to fill in any gaps. Keep attaching them with floral wire, making sure they are evenly distributed around the wreath.
4. Now it’s time to add the decorations and embellishments. Start with larger items like ornaments or pinecones, attaching them securely with floral wire or hot glue. Place them strategically around the wreath for a visually pleasing arrangement.
5. Continue adding smaller decorations and embellishments, such as berries, bows, or figurines. Experiment with different placements until you achieve the desired look.
6. To add a festive touch, attach a beautiful ribbon to your wreath. Create a bow or simply drape the ribbon around the wreath, securing it with floral wire or hot glue.
7. Step back and assess your wreath. Make any necessary adjustments or additions to ensure it looks balanced and visually appealing.
Congratulations! You’ve successfully created your very own DIY Christmas wreath. Now let’s explore some tips for choosing the perfect decorations and embellishments.
Tips for choosing the perfect decorations and embellishments
When it comes to decorating your DIY Christmas wreath, the options are endless. Here are some tips to help you make the perfect choices:
1. Theme: Consider the overall theme or color scheme you want to achieve. Whether it’s traditional, rustic, modern, or whimsical, choose decorations that align with your desired style.
2. Balance: Aim for a balanced arrangement of decorations. Distribute them evenly around the wreath to create a harmonious look.
3. Texture: Incorporate different textures to add visual interest to your wreath. Mix smooth ornaments with textured elements like pinecones or berries.
4. Contrast: Create contrast by combining different colors and materials. For example, pair shiny ornaments with matte greenery or use contrasting ribbons to make a statement.
5. Personalization: Add a personal touch by incorporating elements that hold special meaning to you or your family. It could be a favorite ornament, a sentimental figurine, or a monogrammed initial.
Remember, the goal is to create a wreath that reflects your unique style and brings joy to your home. Don’t be afraid to experiment and let your creativity shine through.
Alternative wreath designs and styles
While the classic round wreath is timeless, there are plenty of alternative designs and styles to explore. Here are a few ideas to inspire you:
1. Square wreath: Create a modern and unique look by using a square-shaped wreath base. Decorate it with a mix of greenery, ornaments, and ribbons for a contemporary twist.
2. Ornament wreath: Skip the greenery altogether and create a wreath entirely out of ornaments. Choose a variety of colors and sizes to create a dazzling display.
3. Natural wreath: Embrace the beauty of nature by using natural materials like dried flowers, pinecones, and twigs to create an organic and rustic wreath.
4. Mini wreaths: Make a statement by grouping together several mini wreaths of different sizes and hanging them in a cascading arrangement.
5. Monochromatic wreath: Stick to a single color palette for an elegant and sophisticated look. Choose ornaments, ribbons, and greenery in varying shades of the same color.
These alternative wreath designs offer endless possibilities for creativity and customization. Feel free to mix and match ideas to create a wreath that speaks to your personal style.
Hanging and displaying your DIY Christmas wreath
Once your DIY Christmas wreath is complete, it’s time to hang and display it with pride. Here are some tips for showcasing your wreath:
1. Front door: The front door is a classic and popular spot for hanging wreaths. Use a wreath hanger or a ribbon to securely attach your wreath to the door.
2. Indoor walls: Hang your wreath on a wall inside your home to add a festive touch to any room. Command hooks or nails can be used to secure the wreath.
3. Windows: Add visual interest to your windows by hanging wreaths with suction cup hooks. This allows your wreaths to be seen from both inside and outside your home.
4. Mantel: If you have a fireplace mantel, place your wreath on it as a centerpiece. Pair it with garlands, candles, or other holiday decorations for a cohesive look.
5. Staircase: Adorn your staircase railing with a garland and attach your wreath to the center for a dramatic and festive display.
Consider the layout and design of your home when deciding where to hang your wreath. Experiment with different locations until you find the perfect spot that showcases your wreath and enhances your overall holiday decor.
Caring for and preserving your DIY Christmas wreath
To ensure your DIY Christmas wreath stays fresh and vibrant throughout the holiday season, follow these care and preservation tips:
1. Avoid direct sunlight: Hang your wreath away from direct sunlight to prevent fading and drying out.
2. Keep away from heat sources: Position your wreath away from heat sources like radiators or fireplaces, as excessive heat can cause the greenery to wilt.
3. Mist with water: Spritz your wreath with water occasionally to keep the greenery hydrated and prevent it from drying out.
4. Store properly: When the holiday season is over, carefully remove any perishable decorations and store your wreath in a cool, dry place to preserve its beauty for future use.
By taking proper care of your DIY Christmas wreath, you can enjoy its beauty year after year.
DIY Christmas wreath inspiration and ideas
Looking for more inspiration to fuel your creativity? Here are some DIY Christmas wreath ideas to get you started:
1. Winter wonderland: Create a snowy scene with frosted greenery, white ornaments, and silver ribbons.
2. Traditional red and green: Embrace the classic color combination with traditional ornaments, holly berries, and plaid ribbons.
3. Whimsical woodland: Use natural elements like pinecones, twigs, and faux animals to create an enchanting woodland-themed wreath.
4. Glamorous gold: Add a touch of luxury with gold ornaments, glittery ribbons, and metallic accents.
5. Coastal Christmas: Incorporate seashells, starfish, and nautical elements for a beachy twist on a traditional wreath.
The possibilities are truly endless when it comes to designing your own DIY Christmas wreath. Let your imagination run wild and create a wreath that reflects your personal style and brings joy to your home.
Conclusion: Spread holiday cheer with your own handmade wreath
Crafting the perfect DIY Christmas wreath is a fun and rewarding activity that allows you to add a personal touch to your holiday decor. By following our step-by-step guide and incorporating your own creativity, you can create a wreath that reflects your unique style and spreads holiday cheer to all who see it.
Not only will making your own wreath save you money, but it also provides a sense of accomplishment and fulfillment. So gather your materials, let your imagination soar, and craft a Christmas wreath that will be the envy of your neighbors.
Remember, the key to a stunning DIY wreath is selecting the perfect base, choosing the right combination of greenery, decorations, and ribbon, and adding your personal flair. With our tips, tricks, and inspiration, you have everything you need to create a masterpiece that will make your home shine with holiday spirit.
Happy crafting and happy holidays!